Today - 10 June 2025
Now - 18:23:45
Now - 18:23:45
The Japanese technique of folding flowers patchwork allows you to create unusual things that you can decorate hair, clothes, interior detail, or just a nice little thing to gift to a loved one. We will try to make in the master class kanzashi and tulips to decorate the magnet.
To create a magnet you will need the following materials:
Now you can start Master class. Tulips kanzashi On the magnet will be created in the following order:
It Remains to add the foliage and collect the item:
Recommended

The rating icons in silver. Assessment of ancient icons photo
The Old Orthodox icons are of great interest to collectors worldwide. It is not only the object of aesthetic and spiritual enjoyment. Old icons are a win-win investment. As a special kind of antique, these are highly appreciated in the market, and th...

So you want to be different! So you want to be irresistible! So you want to see on the figure admiring glances and hear behind rapturous sighs. Although rare, a woman openly admits it. and don't! You just need to tie swimsuit crochet, so&hellip...
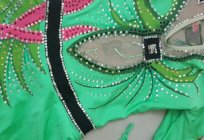
Artistic gymnasts, for whom sport – this is life, the lion's share of time to devote to training and participation in competitions. During this period, they manage to demolish more than a dozen gymnastics leotards. So mom young athletes are con...
So we made a bouquet of tulips kanzashi. Master class for creating a magnet over.
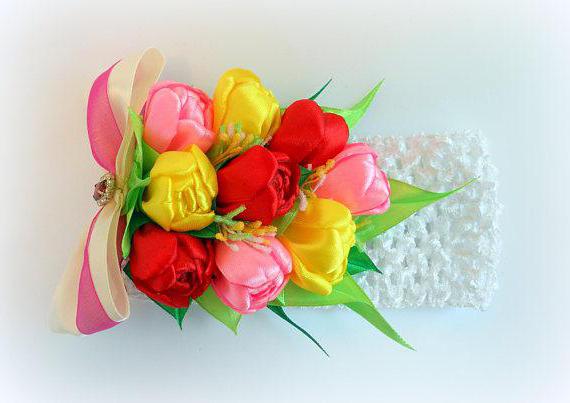
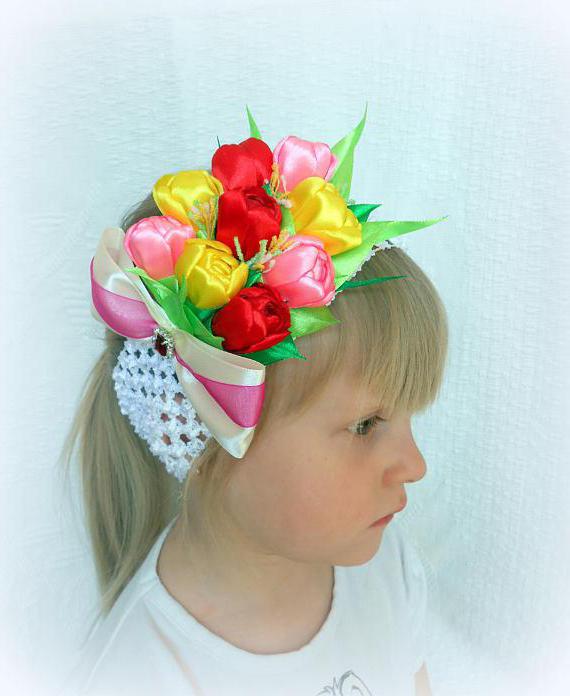
You Can make a bouquet of tulips on the elastic and use it as a hair ornament. Colors to choose any buds, not necessarily to do all the flowers the same.
The bouquet - 9 flowers. The easiest way to do the tulips kanzashi how to magnet using the same technique. Petals made of ribbon width 2.5 cm, the Leaves need only a round shape with an indentation for the flower. Additionally, stocking hair tie and a piece of felt to match.
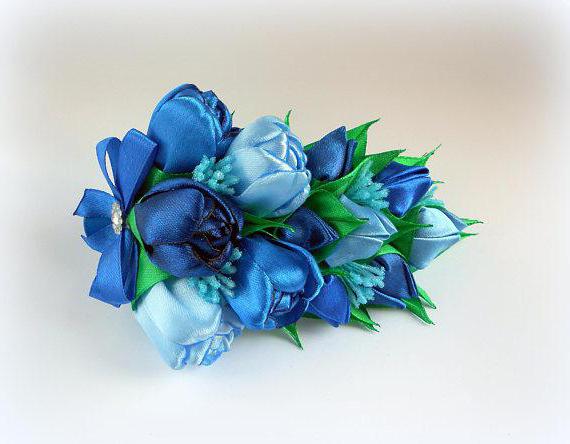
When all of the flowers for a bouquet are ready, take a square piece of felt the size of 4 x 4 cm and cut off three of the area to get a “drop”. Fold it in half and make two parallel cuts to attach the elastic. Then put the elastic, cut a small rectangle of felt and glue to it to secure a large workpiece. The edges of the rectangle pokes in the sections “drop” and glue the ends.
Begin to stick the buds one after the other, forming a bouquet. The bow will need the tape length 17 cm Sew it in the middle and glue to the workpiece, decorating the middle of the brooch or bead. Optionally, a thin ribbon of green color can be cut a few small leaves and add them to the composition, pre-scorching edges lighter.
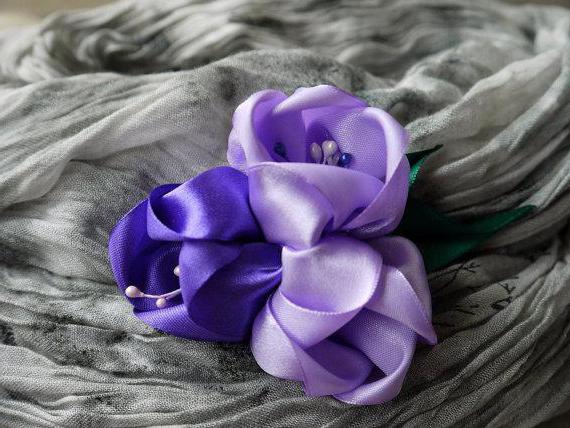
The Tulips in the technique of kanzashi can be used to create the topiary, flower baskets, brooches and other products. Not necessarilymade only of satin ribbons: as the material craftswomen use conventional fabric, vinyl and leather. The main thing - not to limit your imagination!
Article in other languages:
AR: https://tostpost.com/ar/hobby/7598-tulips-kanzashi-master-class-on-creating-accessories.html
BE: https://tostpost.com/be/hob/13569-cyul-pany-kanzashi-maystar-klas-pa-stvarenn-aksesuara.html
DE: https://tostpost.com/de/hobby/13572-tulpen-kanzashi-master-klasse-zum-erstellen-von-zubeh-r.html
HI: https://tostpost.com/hi/hobby/7606-kanzashi.html
JA: https://tostpost.com/ja/hobby/7601-tulips-kanzashi-master-class-on-creating-accessories.html
KK: https://tostpost.com/kk/hobbi/13572-yz-alda-kanzashi-master-klass-ru-kerek-zhara-tary.html
PL: https://tostpost.com/pl/hobby/13559-tulipany-kanzashi--warsztaty-z-tworzenia-akcesori-w.html
PT: https://tostpost.com/pt/hobby/13553-tulipas-kanzashi-workshop-de-cria-o-de-acess-rios.html
TR: https://tostpost.com/tr/hobi/13575-lale-kanzashi-ana-s-n-f-olu-turmak-i-in-aksesuarlar.html
UK: https://tostpost.com/uk/hob/13571-tyul-pani-kanzash-mayster-klas-po-stvorennyu-aksesuar-v.html
ZH: https://tostpost.com/zh/hobby/8268-tulips-kanzashi-master-class-on-creating-accessories.html

Alin Trodden - author of the article, editor
"Hi, I'm Alin Trodden. I write texts, read books, and look for impressions. And I'm not bad at telling you about it. I am always happy to participate in interesting projects."
Related News
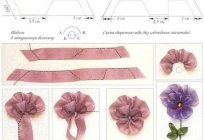
Pansy ribbon: a master class, description, photos
Many skilled workers who are engaged in the design of the home interior or create interesting garments, like pansies of the tapes. Master class, who consistently spoke about the process of this work it is necessary. After all, alm...

How to wear sweaters with bare shoulders
this season, many famous designers presented their collections sweatshirts off the shoulder. Look these things are very beautiful and romantic. It should be noted that to create such an image, the product must be made certainly fr...

How to make a paper plane origami and airplane out of cardboard, starting with slingshot
And while the shelves of children's shops bursting with a variety of toys, the most favorite for the children still toys, made by hand. Girls can spend hours to spend on clothing for their favorite, and the boys, of course, give t...

SLR cameras - what is that technique? What are the advantages of SLR cameras?
technological progress does not stand still, every day photo and video equipment is becoming more accessible to ordinary citizens. Of course, it was not always, after two or three decades ago photo and video equipment could only u...
How to make Pinocchio's nose from different materials
your son or daughter soon the matinee and the teacher told you to make a costume Buratino? Dress child in shirt, pants and vest is easy, but how to make the nose? Pinocchio – a fabulous boy cut Papa Carlo. But not of wood to...

the Christmas and New year – is the tale you want to believe. Order to add an element of fairytale in these holidays, we have the custom of decorating their homes, offices and yards of various toys, garlands, symbols. ...


Comments (0)
This article has no comment, be the first!