Today - 27 June 2025
Now - 10:20:26
Now - 10:20:26
The Twisting of the strips of paper is fascinating and fall in love with the process from the first attempt, because quilling is so simple. From the very beginning you know that the art is subservient to anyone. No need to be a seamstress or an artist, as in other types of handmade, twisted, and beautifully arranged strips of every, even the beginner.
Simple pictures composed of a few elements, capable to decorate any artwork or a postcard on the occasion of the loved one. Quilling - easy and beautiful form of creativity. Of thin strips of different colors created whole paintings and small figurines, you can make beautiful Christmas decorations and original earrings, keychain on your bag or effectively make a photo album for the wedding. Working with stripes is fun for adults and children.
Today we'll talk about the quilling. Novice masters will be useful to know what tools you will need to work on how to learn how to use strips to create different shapes with a template line. Strips of quilling different widths and thickness of paper. The choice depends on whether you DIY. Kits for quilling can be purchased at craft stores and stationery. They are also different. There is a huge and expensive options with many different instruments, and there are cheap that contains only the most necessary to start.
Of Course, if you decide to just first time to try their hand at this art form, to understand what it is all about, you will not be able to buy tools and materials for quilling. To start, simply purchase strips of paper. Screw them on any thin stick - a needle, a rod from the plastic handle, a wooden skewer or toothpick. Even with such a base you'll do great.
Recommended
The rating icons in silver. Assessment of ancient icons photo
The Old Orthodox icons are of great interest to collectors worldwide. It is not only the object of aesthetic and spiritual enjoyment. Old icons are a win-win investment. As a special kind of antique, these are highly appreciated in the market, and th...

So you want to be different! So you want to be irresistible! So you want to see on the figure admiring glances and hear behind rapturous sighs. Although rare, a woman openly admits it. and don't! You just need to tie swimsuit crochet, so&hellip...
Artistic gymnasts, for whom sport – this is life, the lion's share of time to devote to training and participation in competitions. During this period, they manage to demolish more than a dozen gymnastics leotards. So mom young athletes are con...
But if you fell in love with quilling and want to continue to develop, we suggest you to buy a special hook for twisting the strips. This device, resembling staples in bulk, only at the end of a thin metal tube with a forked tip. In this slot is inserted the edge of the paper strip and it is better fixed on the base. It only remains to perform the rotating movement of the handle and the strip will curl up around the web.
If you just do a tight twist in a cylinder of paper, you will only need the hook, but even in the simple craft of quilling need not only tight, but free and twisting lanes. If items in the pictures have the same size and shape, you will need a template. Such a ruler, as pictured in the article below, has many different shapes of holes. Quite freely twisted a circle to insert in the template and flatten with your fingers in the corners to elements of different shapes - triangles and squares, drops and leaves, hearts and circles.
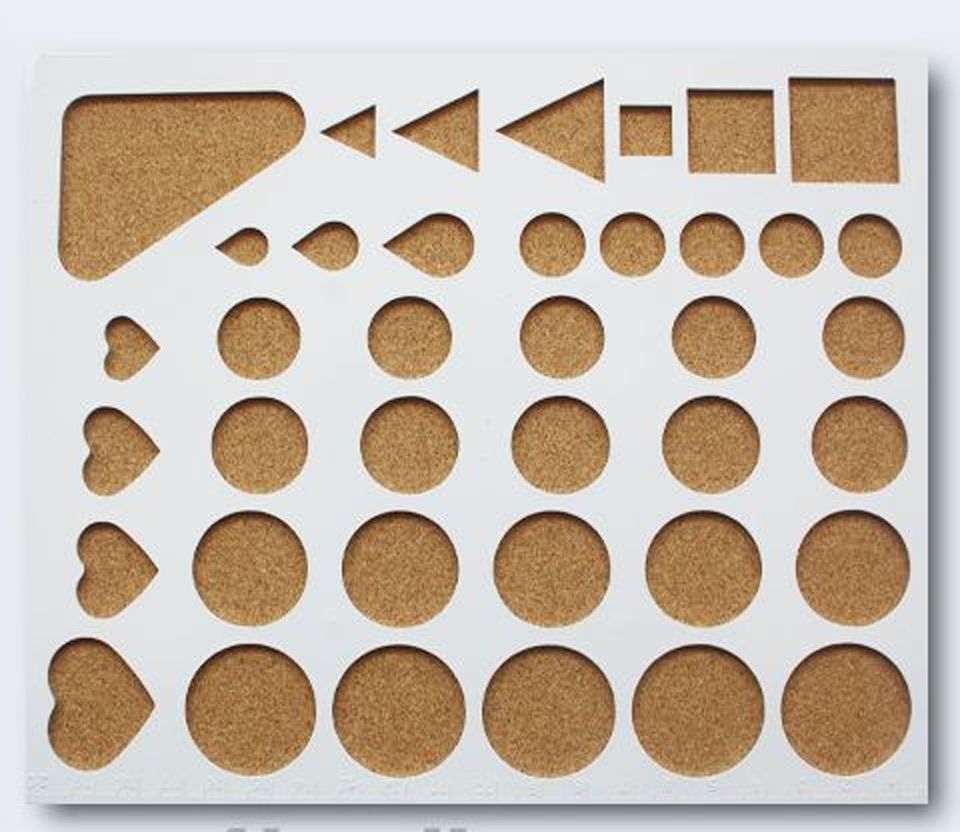
The Template line are very different configuration. When you buy you can choose any option.
Quilling for beginners is a workout twisting stripes in different elements. The first and easiest is dense in the circle. Of these items, you can collect the flower or make it the middle. They fill the void in the picture between the major parts are the eyes of the characters.

The Remaining elements can be seen on any quilling-pattern. A description of each element will look on. To make them easy. The basis is freely twisted strip into a circle. Than the figure of the more, the greater you can squeeze it with your fingers in the formation of a square, star or any other details. For pressing, in addition to the fingers, use the plastic portion of the hook. Press down the circle with two fingers, holding the item with the other hand.
Once purchased a set of quilling, you can start the training exercises in order to learn how to master the technique of twisting strips of paper. Start with simple elements. In the gap of the hook strip is inserted and is running loose wrap of paper around the base. During this effort need not apply. After twisting the circle is inserted into the template. Let's start with the circle. It can be any size. Then the hand is released and the bar, stands up, takes the contours of the desired pattern. On the edge of the strip is smeared with thick glue, and it attaches to the last round. Then the workpiece is removed from the template line.

How to make quilling leaves, look at the pictures above. The workpiece is removed from the template takes two fingers one and the other, opposite side, and lightly pressed down. The principle of folding shapes identical to this, only the compression of the fingers occur at different angles and in other places.
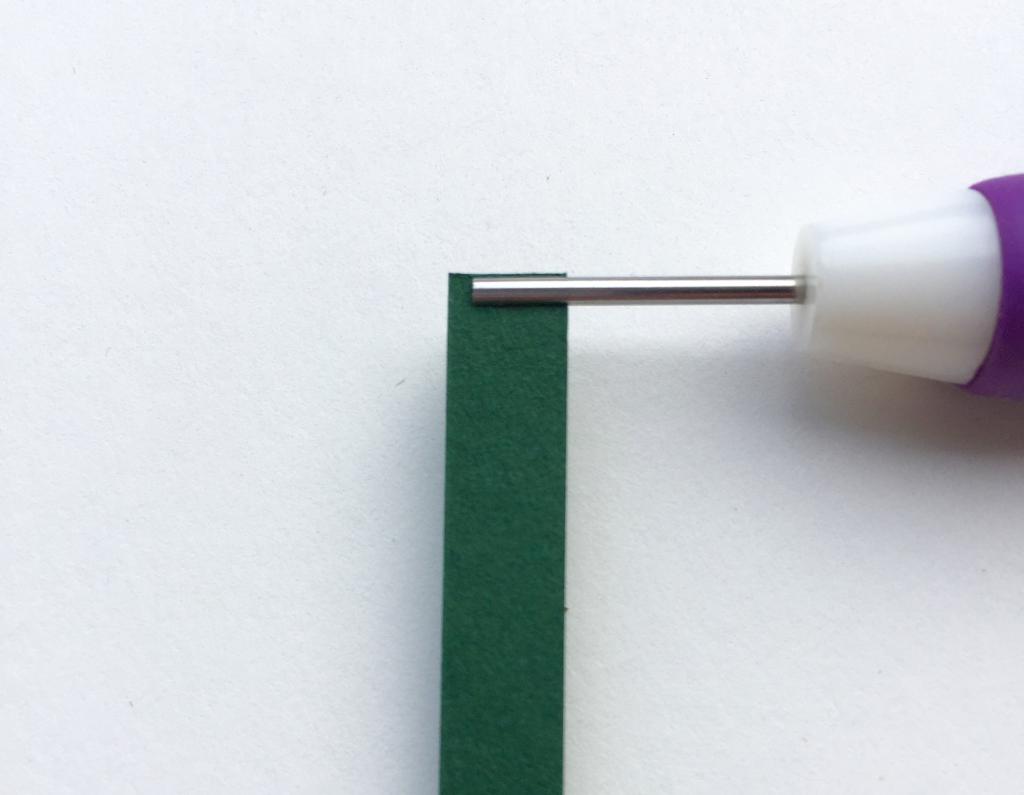
The children can perform the most simple crafts or cards using only the ability to freely and tightly twist strips, forming circles and leaves. Be nicelook Daisy with yellow tight circle in the middle and white leaves arranged in a circle around her. The stem is made from green strips, which have drawn the line at the end. Brush PVA glue applied to the edge strips and it is put on the end. It seems that it absolutely doesn't hold, but it's not, as long as the glue was thick.
In the technique of quilling kids can make a picture of a butterfly or mom beads on the 8th of March. To do this, just the ability to turn tight circles and push them in a strong string of nylon.
Consider carefully the sample in the photo. The flowers are made from two or three different stripes. They differ not only color, but also the width of the strips of quilling. If you are in the sale have not found wide such items, do not worry, you can cut them out from a two-sided printing paper with scissors, ruler and a pencil. Consider, first, what should be the bandwidth, then using a ruler, draw a length of several parts and with scissors carefully cut them.
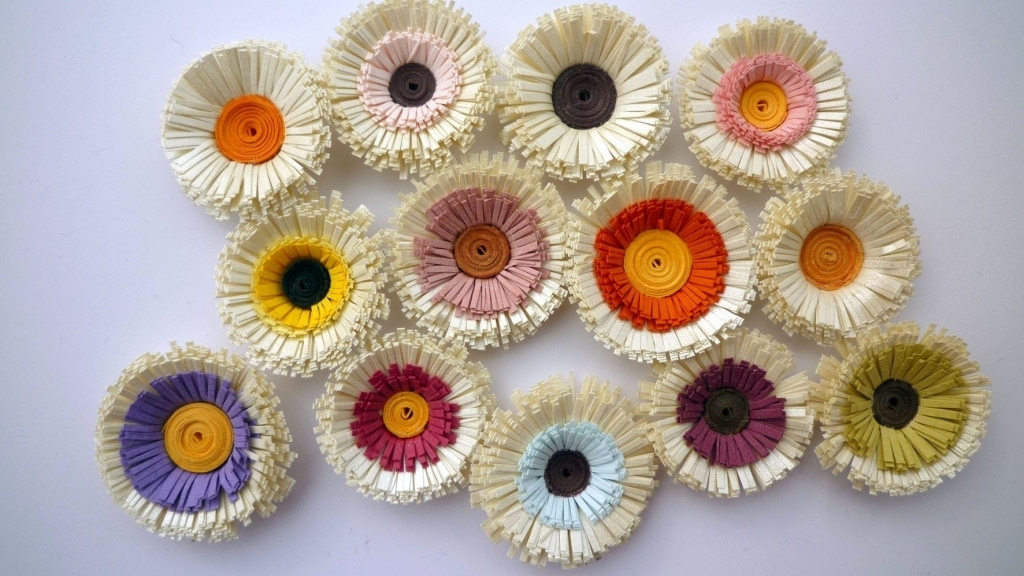
How to do quilling-crafts, consider further the example of the creation of three-dimensional flowers. First, try creating a flower with two types of strips. Of thin colored twisted tight circle. If one band is not enough, in that moment, when one strip ends, get another one and glue it carefully to the edge of the previous one. The winding continues. If necessary, you can add a third.
Wide strip is cut into ½ "noodles." Try to keep all the notches were the same depth and between them was equal distance. If necessary the frequent use in these parts, you can buy special scissors that perform multiple cuts.
Then prepared a wide strip attached to the middle of the flower and the tight winding continues. When the required thickness is reached, the edge is glued on PVA to the last round, and the petals pribavlyaetsya gently by hand so they were distributed across the diameter of the circle.
Read on how to do quilling bulk flowers of two kinds of petals. The principle of work is the same, only strips are cut, not only different colors but also the thickness. First attached to the middle of average width, cut into "noodles" strip, then the widest. When pressure is applied and the distribution of the diameter of the petals will stand out clearly all the layers of the flower.
If you learned how to create from strips of dense circles and leaves, you in the New year to decorate the Christmas tree made in the technique of quilling snowflakes. To make it easy. Hack starts with a Central, twisted tight circle. It will have to glue several strips, as it should be large.
Next you need to roll equal fifteen, and loosely twisted round and form the leaves, crushing two fingers on the circle on both sides. To the leaves were the same, you must use the template. Quilling for beginners requires mandatory work with this ruler.
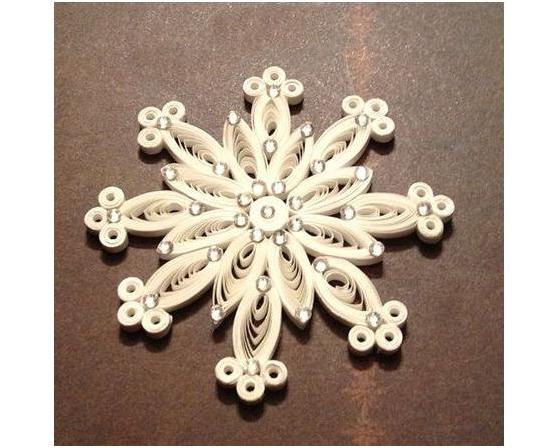
Then begins the bonding between them. To the Central circle to join in the form of the petals of the flower elongated elements. Spread PVA glue on the sharp corner and a little on the side at the base. Then filled the gaps the other leaves. Each area on the outer diameter crafts is additionally decorated with three tightly coiled circles. Windings are wound on a thick hook or rod from the handle to the inside of item had a hole. When performed in the technique of quilling snowflake completed, is to attach the rhinestones, which in the light of the Christmas tree lights will be very impressive sparkle.
The Master-class for beginners in quilling, see below. The photo shows in great detail how to make different items for craft projects. In the gap of the hook is inserted into the edge of the tape and starts twisting. In this case, we need not too tight wrap of the strip. At the end of the winding have the edge of the band spread thick PVA glue with a thin brush and attach it to the last turn of the paper.
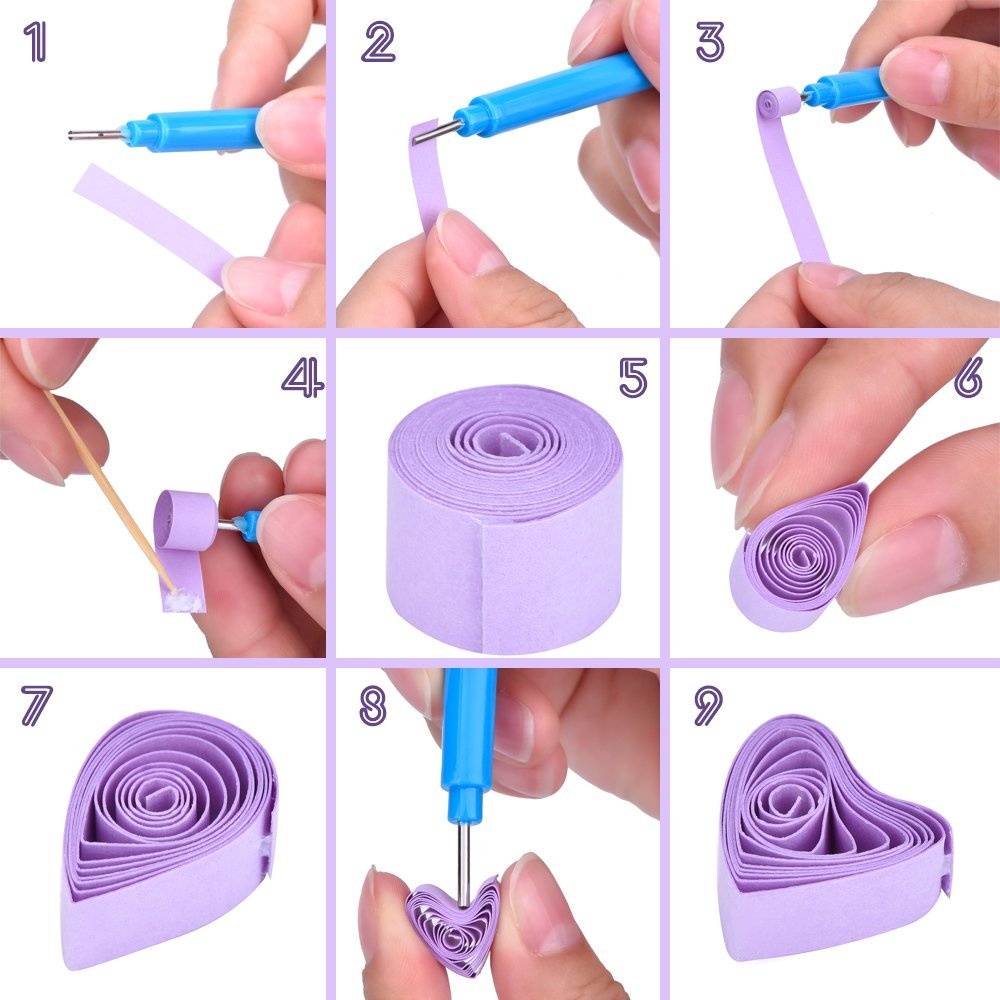
To do a drop, you need to take the resulting loose circle of fingers of one hand over the edge of the circle and gently squeeze. The resulting detail is also often used in the wizard. But let's look at the next stage, when a drop is obtained from the heart. As seen on step-by-step master class quilling for beginners, the end portion of the hook needs a little press down on the center of the rounded part a bit. Let the heart keep in shape, fingers on the opposite side, too, is some pressure.
After the novice master learn to make circles, drops the leaves, you can try to create a beautiful candle holder. It consists of all previously mastered the techniques of twisting bars. Need to work on PVA glue, a circle cut from red cardboard. In the middle you need a pencil to mark the location of the candle. The work will be done around this circle.
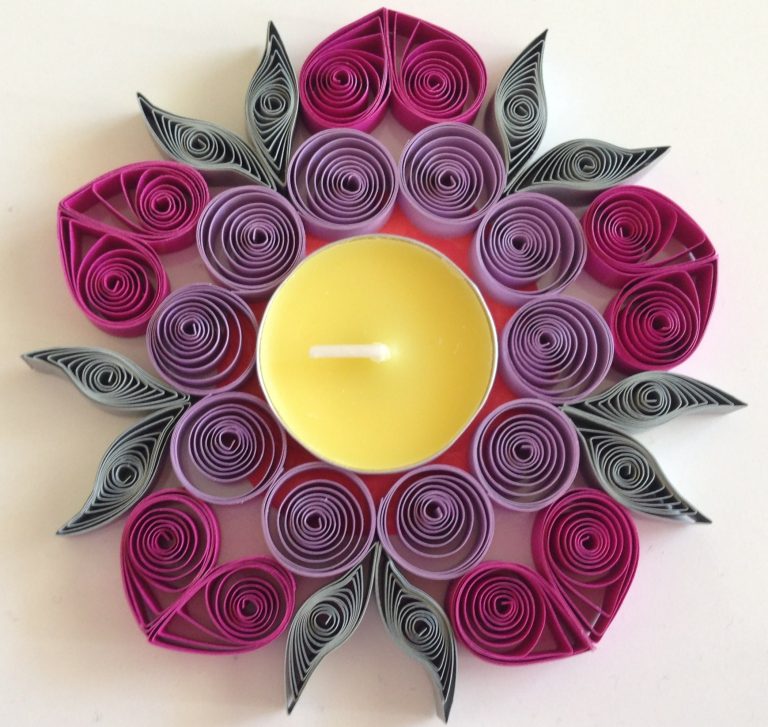
First produced identical lilac, and loosely twisted circles using template rulers that they were the same size. When made 10 pieces, paste them around the marked for candle place. Then take the strip of crimson color and create drops in the same amount. Have ready items in pairs, acute angles to each other. Similar items to hearts. Green stripes make the leaves. All 10 parts are first twisted in the form of a loose circle, then priplyusovat from opposite sides with two fingers. It's only a bend leaves in different directions to the side was not smooth, but wavy.
Fasten the leaves in pairs and attach in the gap between two adjacent circles at the center. This toy is holding steady due to the cardboard stand. Original candlestick can be moved from place to place, nothing will disappear and crafts after the movement will not collapse.
During the development of quilling beginners can try to perform a spectacular basket. The bottom of the crafts drawn by a compass on thick brown cardboard. Then cut the circle gather crafts. The work is performed by a dense twisting of the same size cylinders. The height of the baskets and the colors depends on the wishes of the master. Boca assembled from parts in a checkerboard pattern.

The Handle also has a cardboard base and collected from two different strips. Differences not only in color but also in that the internal light strip has a large width. Decorate the garland you with flowers or butterflies.
The article is very detailed and the description of manufacture of individual elements from strips of quilling illustrate the lightest craft. To perform after reading the data will work and children, and novice masters who used to create with their hands something special, original. Be creative and implement your ideas in the crafts in the technique of quilling. This is very interesting and is sure to captivate you!
Article in other languages:
AR: https://tostpost.com/ar/hobby/13018-diy.html
HI: https://tostpost.com/hi/hobby/13038-diy.html

Alin Trodden - author of the article, editor
"Hi, I'm Alin Trodden. I write texts, read books, and look for impressions. And I'm not bad at telling you about it. I am always happy to participate in interesting projects."
Related News

Ragged applique from color paper – a fun activity for children of any age
to encourage children to be creative at any age. They love to paint, sculpt, glue and cut. Tattered applique of colored paper – a fascinating view of children's creativity. Moreover, even at an early age the child will be ab...
How to make costumes of Alice Fox and cat Basilio with his own hands?
Probably every child and adult familiar with these characters from the tale of Pinocchio. Today we'll show you how with his own hands to make costumes Basilio and Fox Alice!Alicethe Costume of this red cheats easy to make, even fr...
How to sew pants with your hands?
Today we look at a simple technology self-tailoring home pants for baby 8-12 years. Feature products suitable for both boy and girl.so, the fabric you have got a wonderful, dense but soft cotton, with fashionable printed pattern. ...
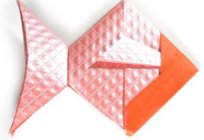
Origami-the ancient Japanese art of making different figures (often animals) by folding paper squares. This art is not complex, but rather is considered to be exciting and interesting!Try to make at least one origami. Fish –...
Undershirts for infants: pattern, process, and modelirovanie
the appearance of the baby – it is a joyful event for all family members. And the hassle of collecting dowry for a newborn are always accompanied by lots of positive experiences. Future moms are trying to choose for his chil...
The tablecloth with their hands. How to sew a beautiful table cloth with your hands
Modern women are increasingly attached to needlework and are trying almost everything to create it manually. Now I want to talk about how you can sew the cloth with their hands.table clothsBefore you can understand the process of ...


Comments (0)
This article has no comment, be the first!