Today - 30 March 2025
Now - 19:51:23
Now - 19:51:23
When you have a child, it is very important to wisely use the living space to have a place for active play. And it's nice when toys, books, and more are always in the same place, so that it is easy to find. Best for this purpose, suitable special racks for toys that you can assemble yourself, pre-prepared drawing.
A Homemade rack for a child's room can be designed so that it is in the process of growth of a child could be transformed. For example, increase the cells, add new ones, to build the section up or across the width of the structure.
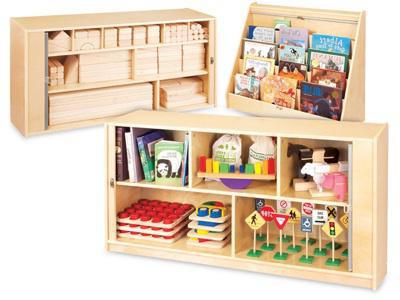 The display Rack for toys with their hands can make even those who have never engaged in Assembly of furniture and not versed in the construction business. Such a design can be made from different readily available materials: wooden planks or boards, chipboard or plastic. But for frame you can use the area on the basis of the metal.
In the literature you can find a lot of designs and drawings for the children's rack, and the color scheme should be chosen together with the child. And if you get creative, you probably themselves will create a furniture masterpiece.
The Most common design on a wooden base, much less make a display rack for toys plastic or some other. We for example, take the first option.
For independent work you will need a set of joiner's and other tools:
Now let's move on to how to make a shelf for toys with their hands.
Recommended

The most effective methods of seed germination
Despite the fact that the method of seedling in vegetable production is a very time consuming process, it is used by most gardeners. Planting seeds in open ground is an easy and convenient method, but it is effective only in certain climatic zones. I...

Retro-reflective paint. The scope of
When the vehicle began to fill the road, their popularity began to gain reflective paint. Thanks to this paint, as drivers and pedestrians becomes much easier to avoid accidents in the dark. Purpose paint Reflective paint – paint material, whic...
How to make icon with your own hands - options izgotovleniya (simple and complex)
In Soviet times, many collecting badges, emblems, pennants. To get them was not easy. And today, thanks to technology, you can make them yourself. Knowing how to make icon with your own hands, and you can make original gifts to your friends, and make...
Naturally, the work will not be so difficult if will be executed according to preliminary blanks. That's why we need at least a sketch — a visualization of how it will look on your shelf for toys. Any photo can be the base for him.
 Shelves for toys can be copied manually, any special requirements, sketch does not exist, so no need to be a professional artist to make it. When he is ready, with a pencil to divide the figure in “parts” and calculate, what quantity of materials required.
Of Course, it all depends on the project, financial capabilities and envelope design. Most often, shelves for toys in the nursery are collected from the following materials:
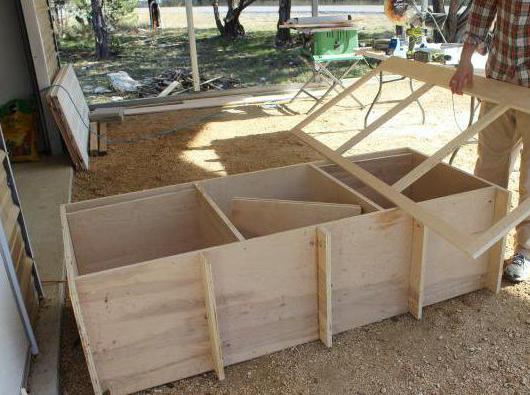
For starters, you need to engage the walls of the future rack. Side, bottom and top should be cut from the boards, and the back part of it — from plywood. Next, prepare shelves with dividers. Preferably each finished part as something to celebrate, it will be useful when working. Also in the side edges, upper and lower edges of the inner walls, cut folds and finally, make the grooves in the right places.
 Cut according to the dimensions of the Board must have a good gusset, which can provide spikes and eyelets. End parts make a fine-toothed hacksaw cuts on the thickness of the connected parts.
A Sample of a groove under the tongue is performed with a chisel or a chisel. Glue the joints of the parts of the rack and connect them with clamps until they are dry. The inside of the frame it is best to put additional fasteners in the form of a metal area.
When the rack frame is ready, it is advisable to make an exact layout for the installation of internal structures. So it will be easier to navigate where there will be shelves and vertical partitions.
Together with delimiters you need to connect by means of special nails at the rate of two pieces for a single fastener. Also, these places need to glue.
And to secure the intermediate shelf, you need to make a studded connection of the ridge to a pile of round or square shape. The easiest option — the use of wooden studs. Under it you need to make through holes on the Board frame, and the ends of the shelf, which involve, drill nests that are the size of two-thirds of its length. Further studs put on a carpenter's glue or PVA glue.
After the design dries, it is treated with emery paper, then coated with paint or varnish. And then shelves for toys when mounted on a right place tacked to the wall with a metal corner. When installing a shelf fixed corner clamps to ensure straight corners and structural strength.
To begin, cut a piece for decoration the top edge of the design with a hacksaw and bevel the ends at a 45 degree angle. Toto translate content, follow dimensions. Apply seam adhesive, then put the baguette and press with clamps. Similarly, install the remaining part is in the end secure the corner connection.
However, remember that our shelves for toys, respectively decorate them more interesting. For example, the boxes will look more fun if they hang self-adhesive melamine edge. Another option — set the leaves of different colors or paste over the surface with a film of a particular shade, or with the image of a cartoon or fairy tale characters.
For the attachment edges attach its adhesive side to the end part of the structure and warm through iron. Then smooth the cloth until it stick firmly to the surface, scrape off the excess edges with sandpaper or a blunt knife.
To equip their design, nothing complicated, the main thing is to correctly calculate their dimensions. Rack toys with boxes are also easy to assemble as usual. For the basics we need chipboard, a plate must have a thickness of about 16 mm. But as a bottom it is recommended to use hardboard, which is either cut into the wall, or nailed to them by nails.
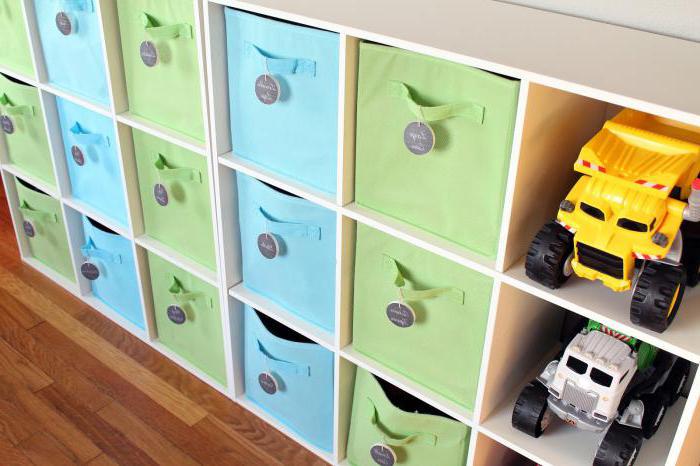 To the boxes were free to move from their cells, it is desirable to buy special rollers for furniture. In addition, they will serve as an additional fastener to the bottom of the structure.
The facade of the box can be made of colored chipboard, and prefabricated structures the right size.
Also, in addition and rollers, prepare the screws for their fastening, loops for plates and confirmati — tie.
Our shelf for toys, with his own hands constructed, almost ready.
In the end, you will need to drill holes on the structure for fastening rebar, and then produce a finish:
To drill the hole correctly, mark its center with a core, and then carry out the work through the drill with the right diameter. In the gap insert the markers for the dowels that will help to mark the place for drilling under the second part. So match up the holes with the Assembly design. The dowel is inserted, when the space for the fasteners done on both parts.
 We covered how to make a rack of wooden toys, now let's explore how this work can be carried out using other materials.
Shelves for toys on the basis of this material to make not so difficult. Design in the end will last long enough. Before operation, be sure to make her a sketch and calculate the required amount of material to work with. As a rule, dimensions are: plasterboard sheet with a width of about 1.2 m and a length of from 2 to 4.5 m. its Thickness is 6-24 mm.
If in addition to toys and other baby accessories you plan to put the rack on the TV or something overall, instead of the usual profile, it is recommended to purchase area of the metal.
For the frame fit the usual UD profile. Attach the rail base to the floor and the wall with the screws and they lift vertical sidewalls, a horizontal shelf and the intermediate piers. Frame during the installation process, you need to constantly check the evenness in horizontal and vertical with a spirit level.
When it is ready, take the metal screws of size 25 mm and secure them using the top and bottom shelves. Then the frame is sheathed with fine pitch drywall. You can use all sorts of corner and smooth transitions, not limited to right angles and lines.
First clean the surface from dust and dirt, then treat the place screwing screws with a special primer. Then glue on the reinforcing mesh to the seams and butt. Don't forget they also primed.
The Angles and slopes are equipped with metal or plastic area. If the shelves are notched or arched, choose a product with a bendable structure. Apply the putty area on two sides of the same evenly and press it down as tightly as possible. If part of it made through the perforations, remove it a staple and flatten the surface.
When starting the first layer of putty dries, apply a second, he's — final. Try not to damage finish. With this purpose, place the spatula on the edge of the working edge is clean and smooth.
After curing the last layer zashlifovyvajut all surfaces a special float, equipped with a replaceable abrasive mesh, then smear them with primer and covered with latex paint.
It is Highly desirable that shelves for toys in the nursery in harmony with other furniture.
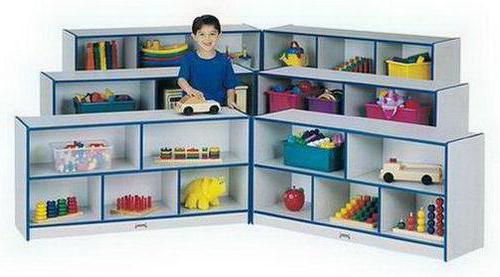 Technology of this type of construction should stay separate. If you want to do for the nursery corner shelf for toys, then prepare the following:
The First thing you will need from chipboard saw blades to cut the upper and lower wall, then — five shelves, and then the connecting structure in the amount of four pieces. Every detail must have its size. Then clean the edges with sandpaper and glued maple fingerboard on the edges through iron. Remove unnecessary edges and connect the place of bonding parts with screws.
 Drill along the bottom and top edges of the three holes. Then the details of the structure glued and fastened with the same screws. Rack we recommend collecting, starting with the bottom shelves and walls as the top and bottom edges must be in one plane.
The Next step is gluing and screwing the shelf to tender the connecting wall along the short edge. And to its upper edge mounted second. Next, execute the same actions in the same sequence. At the end of the rack is attached to the upper shelf.
Of Course, far it is always the parents can make shelves for toys with their hands or buy them. Sometimes the question is in Finance, also, the cause may be little room or time constraints. Therefore, in an alternative and simple ways to build a place for toys to bring are:
Well, if you and your child want something more simple and less original, and the space in the room allows, it is better to buy a cupboard to fit anything.
Ideas on this issue very much, however, to make a display rack for toys with their hands will be very interesting for the parents themselves, can be connected to the process and children.
Article in other languages:

Alin Trodden - author of the article, editor
"Hi, I'm Alin Trodden. I write texts, read books, and look for impressions. And I'm not bad at telling you about it. I am always happy to participate in interesting projects."
Related News
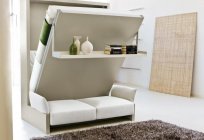
Bed built into the wall. Ideas for your interior
are You tired of boring soft bedroom? You have a great room for guests, you nonetheless hesitate to show? Enable it in the guest space! Dilute the standard atmosphere of fun and creative ideas! One of the best ways to diversify th...

Almond Pink foam – planting and care of ornamental shrubs
Ornamental shrubs can transform your garden, give it a festive look. Pick up the necessary plants can be in specialized stores in nurseries. How charming you look in the garden shrubs, decorative photo demonstrates. Lush spring bl...

Wwcb and their application in construction
wwcb are bio-resistant, nonflammable, environmentally friendly, multifunctional building material, obtained by extrusion of a mixture, composed of wood chips, specially cut wood wool machine, Portland cement, brand which should be...

What is the formula to calculate the width of the apron in the kitchen
the Kitchen — the most visited place in the apartment house. Here we are preparing to eat and actually eat. For this reason, the kitchen gets dirty easily. One of the excellent solutions in terms of fast cleaning in the kitc...

The terrible attack - the bugs in the apartment! How to get rid of them?
How important it is for each person to have a comfortable home, know of any. But sometimes the creation of a comfortable holiday dwelling becomes impossible due to the presence of some unwanted tenants – insects. Flies, mosq...

Cucumber "Dirigent": grades and reviews
Among vegetables cucumber is the place of honour. It has a pleasant taste and useful qualities. Being an excellent dietary product, suitable for all salads, is also essential for canning and pickling. In this paper, we consider a ...


Comments (0)
This article has no comment, be the first!