Today - 14 March 2025
Now - 13:20:29
Now - 13:20:29
Before you make a microscope with your hands, you should understand what it can be used and what materials are required for this. It should be mentioned that to build a structure yourself, you do not need any expensive items.
 In principle, the primary aim of any microscope – zoom in a few dozen or hundred times. The presented devices are used not only in biology lessons at school, but also in medicine, electronics and other fields. For example, the digital microscope, it is possible to repair very small chips, mobile and computer boards.
The Most convenient is the electronic apparatus, as it can increase the object so much. It should be noted that to build a microscope with your hands no big deal. You just need to know its structure and collect necessary materials.
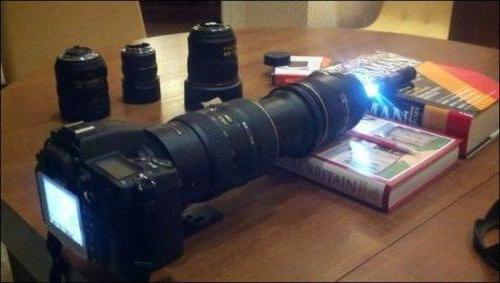
Of Course, to construct a microscope with your hands can zero. However, it is often those people who are versed in electronics, computer technology and optics, shows a device made on the basis of other units, cameras, binoculars, web cameras.
Before you start making a design, it is necessary to define its functions, to select the items you want. It is also desirable to make the drawing device on the paper. Of course, made all the necessary calculations.
 In order to make the microscope with your hands without ready devices, you'll need this equipment:
- the Tube of glass. Its length should be approximately 20 cm and a diameter-6 mm.
- Several plates (preferably copper). Metal thickness should not be large (about 1 mm). With regard to the overall size of the plates, they account for 3*6 cm.
- Some small glass.
- Drill a small diameter.
- Gas burner.
the Hammer.
Screwdriver.
- the Nuts and bolts.
If you have no metal, which will serve as a basis for design, you can use a thick cardboard. However, note that in this case, the apparatus is durable and will last a long time.
Recommended
The most effective methods of seed germination
Despite the fact that the method of seedling in vegetable production is a very time consuming process, it is used by most gardeners. Planting seeds in open ground is an easy and convenient method, but it is effective only in certain climatic zones. I...

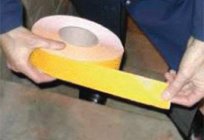
Retro-reflective paint. The scope of
When the vehicle began to fill the road, their popularity began to gain reflective paint. Thanks to this paint, as drivers and pedestrians becomes much easier to avoid accidents in the dark. Purpose paint Reflective paint – paint material, whic...
How to make icon with your own hands - options izgotovleniya (simple and complex)
In Soviet times, many collecting badges, emblems, pennants. To get them was not easy. And today, thanks to technology, you can make them yourself. Knowing how to make icon with your own hands, and you can make original gifts to your friends, and make...
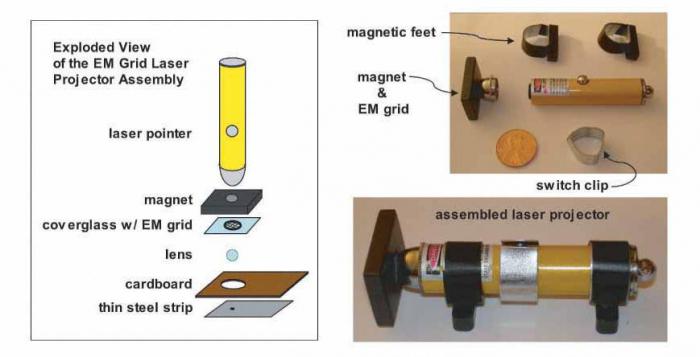 Before the microscope, read the sequence of pieces of work:
1. First of all, from the glass tube with the burner it is necessary to make a small ball, which will serve as a lens for the device. Note that this element is in any case impossible to touch, as the surface will remain traces, which would then distort the image.
2. At this stage you need to make the case for lenses. This will require a metal plate. To the use of such a device was convenient and safe, you need to round the corners. In “body” you should drill holes: 4 mounting and one observation.
3. Now you can assemble the entire structure together. For this purpose between the plates is set to "lens", and the case is held together by bolts. Further, one side of the lens with duct tape can be stuck to the glass, on which is laid the object.
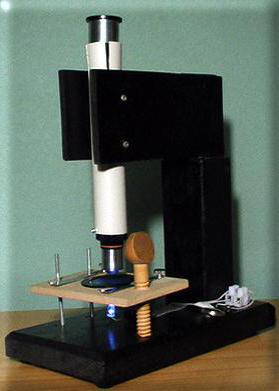
This design microscope is a manual and very simple. The presented device can benefit from adults at home and children. For professional work you'll need a more complex digital camera. Next, you will learn how to build.
 To manufacture the devices commonly available webcam. Before you make the microscope of this type, gather all the necessary materials and tools:
- a Personal computer or laptop.
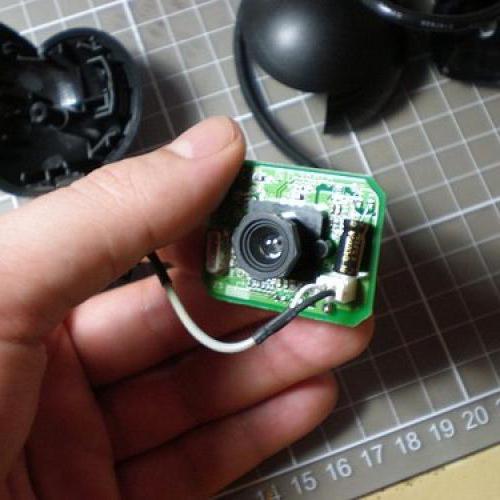
- a Web camera (preferably with manual focus setting). Note that we need the lens, so it should be easily removable from the original device.
- Several large and small angles, of which later will be built the stand.
- steel small Tube diameters and special mounting which can be moved and fixed on the surface of the metal.
Glass.
- a Small mirror or flash of the mobile phone to construct the backlight.
- Metal plate for manufacturing the platform.
- Fasteners and gun with glue sticks.
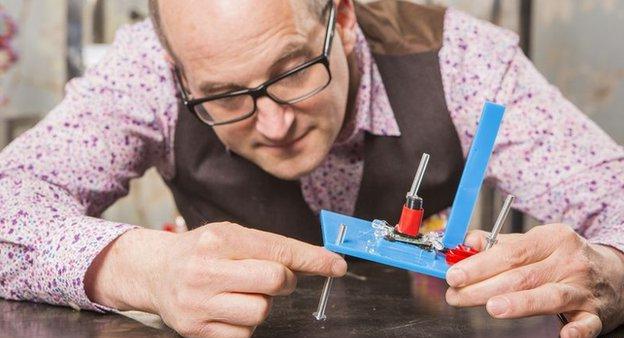
 Digital microscope with your hands is very simple, you only need to follow a certain sequence of actions:
1. To begin to build a “skeleton” design. For this you need a metal plate to connect the corners. All the elements can be bolted. As a tripod you can use a metal pipe of small diameter. It has certain advantages. For example, by means of special fasteners, you can to the vertical element to tie another small piece of pipe to which is attached the lens. If necessary, you can raise orto omit this element. In addition, for the construction of the platform, you can also use a small cardboard box, which is inserted into the tripod and filled tile (or other) adhesive. Keep in mind that the design should be as stable as possible.
2. Then you can make the controller adjust the focus. To do this, use nylon thread (or rubber band), movable bushing, a lug for fixing the threads on the tripod. That is, you need to make a kind of reducer, whereby the precision of focus of the lens is extended.
3. Further electron microscope with your hands is simple. Now you should Unscrew the lens from the webcam. Do this carefully so as not to damage the element. Next you need to flip it over and put in place. For mounting, use hot melt glue. The finished design can be attached to the movable part of the tripod. Under it should be arranged the stage with light. To do this, use the ordinary led.
4. In the last place you need to handle the wire of the webcam. That is, you should cut him a thick braid. In this case, it will become more flexible and will not interfere with the movement of the lens.
Now you know how to make a microscope with your hands. Good luck!
Article in other languages:

Alin Trodden - author of the article, editor
"Hi, I'm Alin Trodden. I write texts, read books, and look for impressions. And I'm not bad at telling you about it. I am always happy to participate in interesting projects."
Related News

Garden maintenance in autumn. What to do in the fall in the garden?
Every true master knows that the garden in autumn needs a lot of attention and care. The work done in these months, is designed for the cultivation of the soil, enriching the earth the necessary nutrients and protect plants during...

Welding of metalwork: technology and features
One of the most commonly used in the production of mass and small batch products of the ways of joining parts is welding. With its help it is possible to collect virtually any pair of elements – t -, corner, butt and lap. Ov...

The barberry Bush: a description, planting and care
Beautiful ornamental shrub is a barberry will give your infield a magical and unique look in the spring when in bloom its yellow flowers with a delicate fragrance, to late autumn, when the brush of bright red fruit perfectly with ...

Planting Apple trees in autumn: tips gardeners
Novice gardeners always wonder when is the planting of a tree in autumn or spring. What are the techniques in order to grow strong and healthy? Usually Apple trees planted in the early spring, immediately after the onset of the th...

The ends is a narrow side of the building?
Solving a crossword puzzle or reading an interesting article, perhaps you had to deal with the word "end" or "ends". Many may say that the answer is quite simple. But, this is only at first glance.What is the ends?In the Russian l...
Anti-slip pads on the stage. Profile anti-slip rubber
the Climatic conditions in our country are such that the formation of ice on the ladder rungs are almost inevitable. The construction of modern shops, offices and other public institutions often apply finishing materials such as m...


Comments (0)
This article has no comment, be the first!